Creating a Property.CoZa Email Signature

Creating a Property.CoZa Email Signature V3.0
To create your Property.CoZa e-signature, login to LMS and open the menu on the left-hand side of the screen by moving the cursor to the far left of the screen. Select Profile.

Step 1 of 4
If you have already used a Property.CoZa e-signature, it may be necessary to update your information for the new design of the e-signature and to Save Changes to update to the new design.

Step 2 of 4
Update your details:
- Primary agency: this is the office that you operate from and will be selected for you.
- Designation: this is a mandatory field and there are two options, Property Professional or Intern. In terms of the Estate Agency Affairs Boards (EAAB) requirements, if you have not completed your real estate qualification, FETC: Level 4 Real Estate certificate, you are still required to work with a Mentor Agent and your designation is Intern. Once an Intern has obtained the relevant qualifications and updated these with the EAAB to full status agent, this option can be changed on the pull-down menu.

- Qualification: this relates to the highest real estate qualification you have achieved from the EAAB or Services SETA and what you state here must be supported by the relevant certificate.
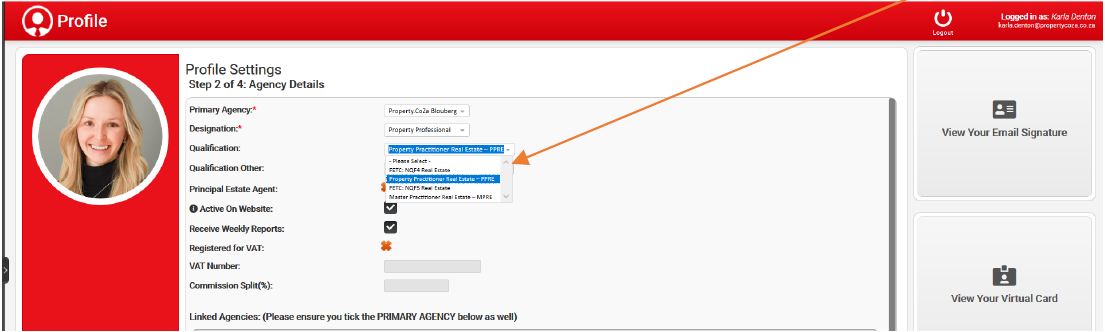
- Qualification Other: relates to recognised qualifications, that are not specific to real estate, that you have achieved, e.g. Principal, B.Com Hons (Marketing) (UNISA) or B.Ed. Do not state qualifications that cannot be supported by official certificates.

Step 3 of 4
- Ensure that Your Profile Picture is a professional photo, following the Property.CoZa Corporate Identity requirements, i.e. with a 20% grey background.
- Update your personal Biography providing information on your business background and experience in the real estate industry. This document can be captured on Biography or you may cut and paste the content from a Word document.
- Select View your Email Signature to preview your email signature.
- To update your signature, select Save Changes.

Download my Email Signature and save on Outlook signatures
Once you have saved the changes to your email signature, you may download the signature and save it to your Outlook signatures.

Click on Download my Signature and Open with Word by clicking OK.
A Word document will appear with your email signature. Make sure that you include the whole email signature, including the icons below:

Press Ctrl and A to select all, then select Copy. Or highlight the signature to include the floating icons that are interactive, and Copy the signature. Paste this in Outlook signatures. Please remember to delete everything from the previous signature or you will have duplicated icons.
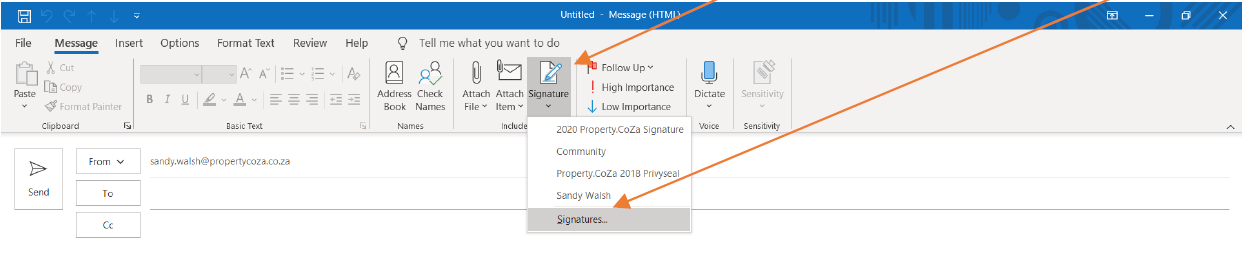
Save your Email Signature to Outlook signatures:
Open Outlook and select New email, select Signatures from the Menu and select Signatures to edit.
OR
Select FILE / OPTIONS / MAIL / SIGNATURES
Select the signature that you want to replace and delete.
Continue as below:
Select New and name the signature, e.g. ‘2020 Property.CoZa’ and paste the signature to your new signature by pressing Ctrl and V or selecting paste, then choose the default signature and select your default signature for your emails.

Click OK to save.
